ContextClip Documentation
Point at a control. Paste what it is — and how it looks — into your coding agent.
ContextClip is a small macOS menu-bar app. You hover the UI you care about, press one shortcut, and paste into Claude Code, Cursor, Codex, or ChatGPT Classic. The agent gets a screenshot and the accessibility description of that control (role, name, identifier, position) — not a guess from pixels.
It does not click for you. You stay in control. The agent just finally knows which button you mean.
Who it is for
People who already talk to an agent while building a Mac or web UI:
- “What is this control, and where is it in the code?”
- “Rename this button. Don’t invent a new one.”
- “The layout is 8 pt off — here is the real frame.”
If you have ever screenshotted a window and then typed a paragraph explaining which widget you meant, this is that paragraph — generated, structured, and pasted in one stroke.
Early access is intentional. First customers who use it on real work will see the sharp edges we cannot see in our own chats. That feedback is the point of shipping now.
What gets captured
Every capture can include two layers:
| Layer | What the agent learns |
|---|---|
| Screenshot | How the UI looks right now |
| Accessibility tree | What the control is: role (button, field, checkbox…), title, identifier, enabled/focused, on-screen frame, and a short ancestor chain |
A picture without the tree is a screenshot. A tree without a picture is a JSON dump. Together they are a specification of “this thing on screen.”
With ⌃⌥C the capture also says what you were pointing at. The summary has a line
Pointer was over: … with the control under the cursor, and a block Around the pointer
with its neighbours — the other rows of the same list, the other buttons of the same
toolbar. With ⌃⌥C the screenshot and the tree come from the same window. With ⌃⌥R the
screenshot is a slice of the screen and may show more than one window, while the tree is
still built from one.
Where captures go
ContextClip does not log into any of those products. It writes a bundle on disk and puts a carefully chosen payload on the clipboard. Each host reads the clipboard differently, which is why Settings → Agents → Advanced has a Pasteboard format.
Which format to pick for your agent, and what arrives in the chat after ⌘V, is covered in Paste formats.
The interface
ContextClip lives in the menu bar. It has no Dock window. Click the clipboard icon.
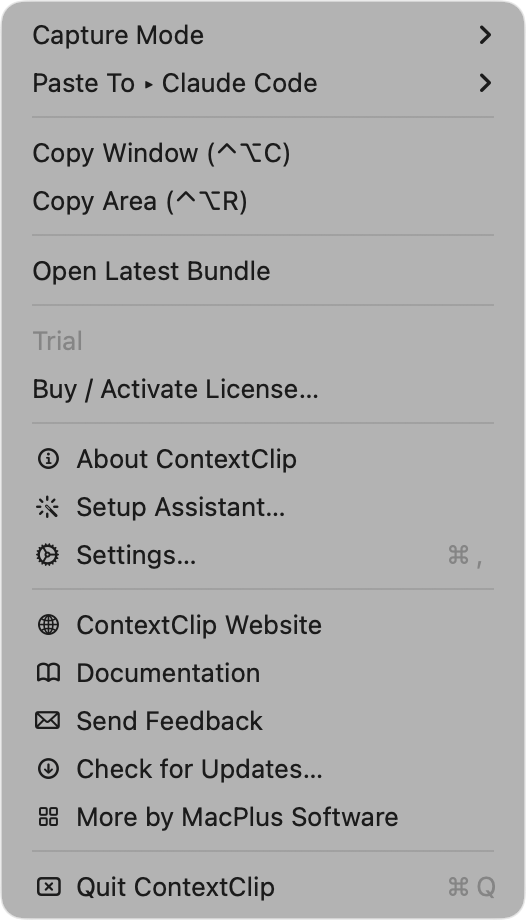
Menu bar
| Item | What it does |
|---|---|
| ⚠︎ Permission warnings | Shown only while Accessibility or Screen Recording is missing, with a jump into the Setup Assistant |
| Capture Mode | What the shortcut will copy: Full capture (for agents), Screenshot only, or Text tree (cloud chat) |
| Paste To | Which agent the clipboard is prepared for: Claude Code (default), Cursor, Codex, ChatGPT Classic |
| Copy Window (⌃⌥C) | Capture the front window now |
| Copy Area (⌃⌥R) | Drag a rectangle, capture what is inside it |
| Open Latest Bundle | Opens the last capture folder in Finder |
| License | Status line, who it is licensed to, and Buy / Manage |
| About ContextClip | Standard About panel with the version |
| Setup Assistant… | Re-run the permission walkthrough |
| Settings… (⌘,) | Full settings window |
| ContextClip Website · Documentation · Send Feedback | Links |
| Check for Updates… | Sparkle update check |
| More by MacPlus Software | Other apps |
| Quit ContextClip (⌘Q) | Quit |
The shortcuts in brackets are the ones currently set; the menu follows Settings.
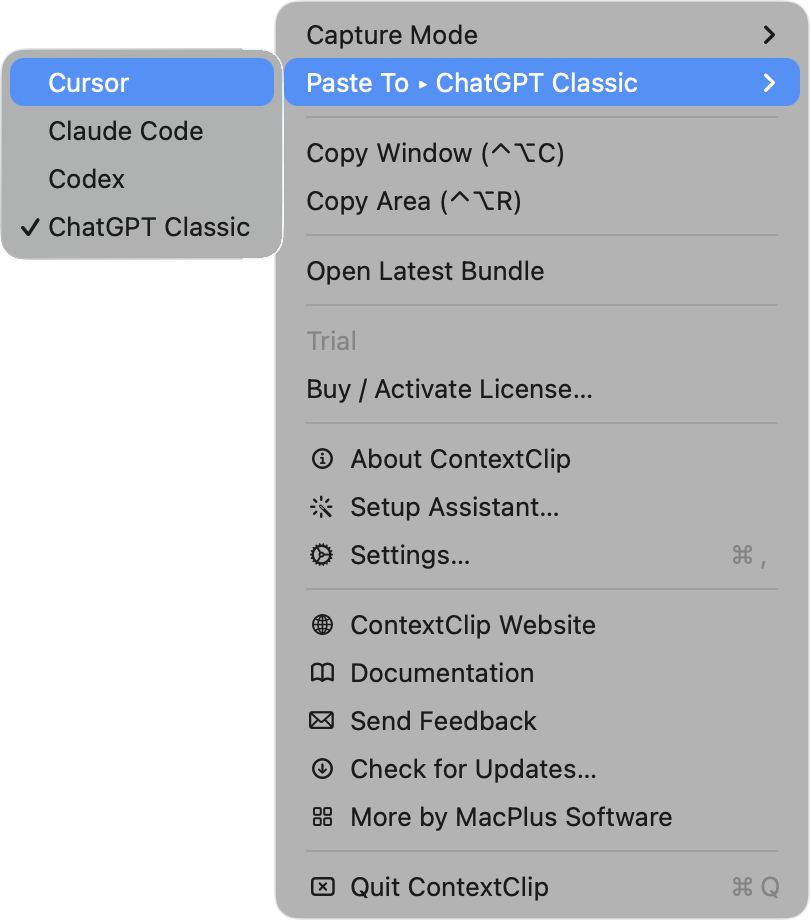
Capture from the menu reads the front window, not whatever is under the cursor — by
the time the menu is open, the cursor is on the menu bar. That is also why a capture
started from the menu has no Pointer was over line and no Around the pointer block:
there is nothing under the cursor but the menu. Use the shortcut when you care about a
precise control.
Shortcuts
- ⌃⌥C — the whole window under the cursor, plus the control you were pointing at and its neighbours. In Screenshot only mode it takes the front window instead, with no pointer line.
- ⌃⌥R — drag a rectangle over part of the screen.
These are the defaults. Both can be changed in Settings → General: click the field, press the new combination. Clearing a field turns that shortcut off: the menu shows a dash in its place, and the menu items keep working.
A toast confirms the capture landed on the clipboard and names the agent it was prepared for. Press ⌘V in that agent’s chat.
Settings
Settings… or ⌘, opens a window with four sections down the left side:
- General — both shortcuts (click a field to record your own), Launch at login, the Last action line (what the last capture did, including how many accessibility nodes it carried), and the build version.
- Capture — capture mode; which Markdown file on disk is the primary one
(
capture1.mdexperimental,capture.mdstable; both are always written); Unique file name (off by default) for chats that keep every attachment; and Shortcut on the Desktop (on by default) for~/Desktop/ContextClip-latest. - Agents — Paste To, and under Advanced the pasteboard format.
- Privacy — live state of both system permissions with a jump into System Settings, and a note that only the 25 most recent captures are kept on disk.
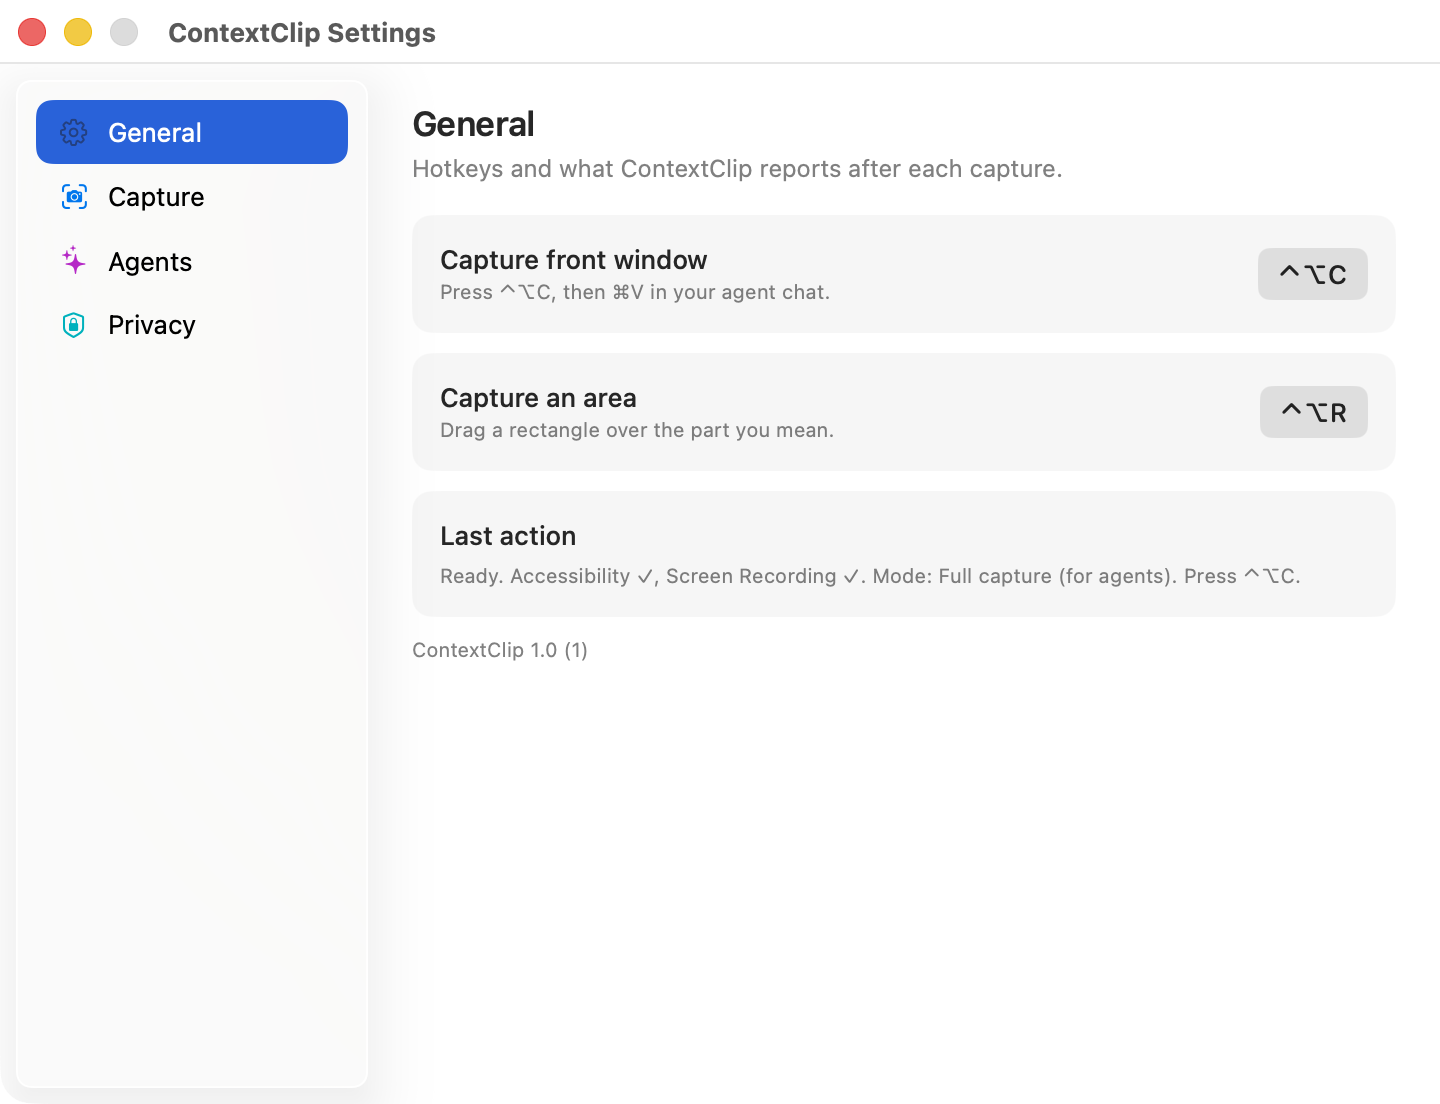
Leave Full capture + Experimental (capture1.md) unless you are comparing
formats on purpose.
The three capture modes
| Mode | Put this on the clipboard | Use when |
|---|---|---|
| Full capture | Picture and/or @files, plus a folder on disk with screenshot + tree | Daily work in Claude Code, Cursor, Codex |
| Screenshot only | The frontmost window as an image | You only need “look at this” |
| Text tree | Accessibility JSON as text | Cloud / Grok / any agent that cannot read your files |
In the menu the same three read a little longer — Full capture (for agents), Screenshot only, Text tree (cloud chat) — because there is room for the hint.
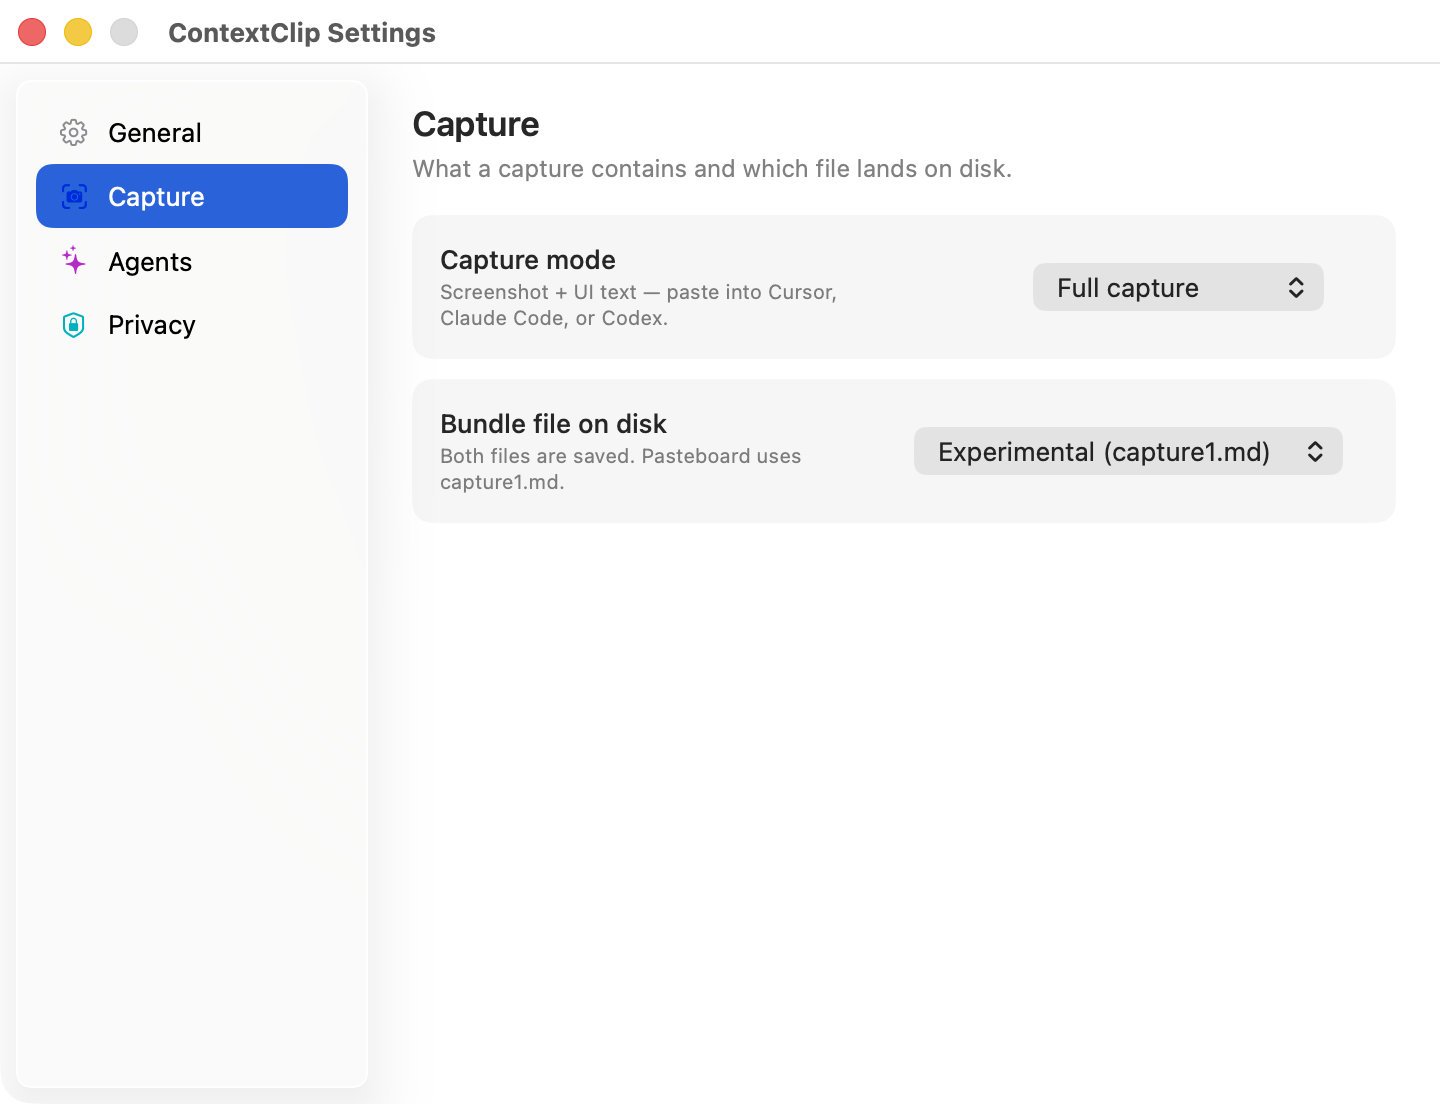
Region snap
Press ⌃⌥R, then draw a rectangle around what you mean.
⌃⌥C grabs the window under the cursor whole. That is enough to start, and easy to miss: a pixel of chrome, the wrong pane, a whole window when you meant one form.
Region snap is the product gesture:
- Press ⌃⌥R (menu: Copy Area).
- Drag a frame around the controls (a dialog, a toolbar, a single button).
- Release the mouse — that is the capture. Press Escape while you are still dragging and nothing is copied.
- The screenshot is cropped to that frame.
- The accessibility tree keeps only controls whose frames intersect the rectangle — the ones you boxed, not the rest of the window.
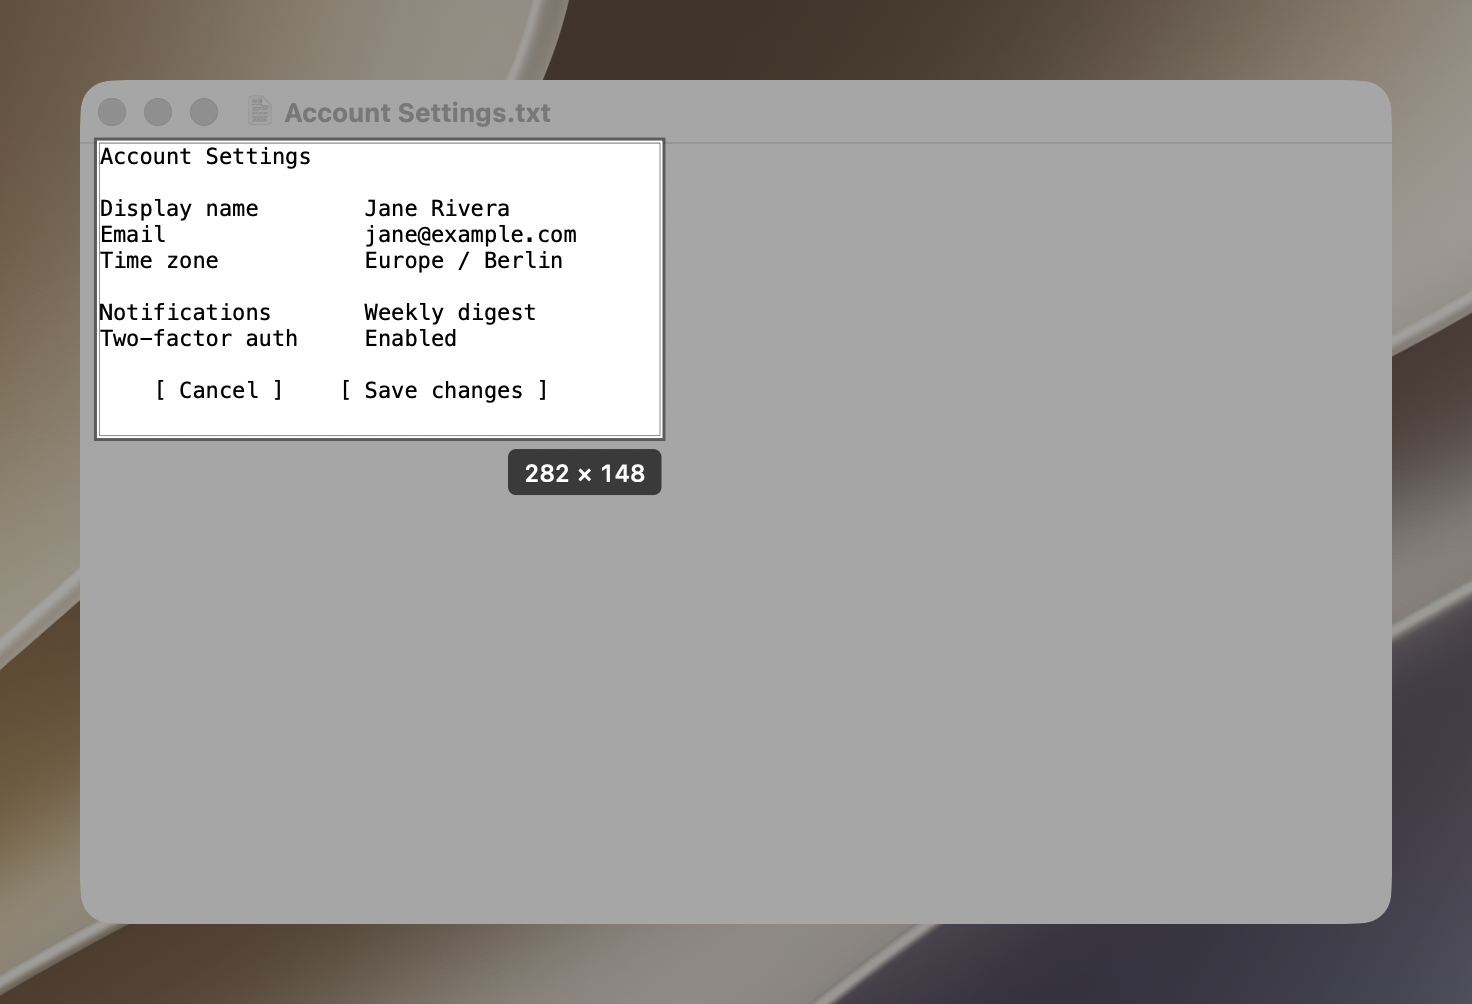
Why this matters: the agent should reason about your selection, not the entire app chrome. Paste formats do not change. Claude, Cursor, and Codex still receive the same kind of package; the package is simply smaller and aimed.
A later “inspect” mode (hover highlight, click to pin a control) is the same idea with a finer aim. Region is the one you will use first.
Where the files are
Every capture is written to its own folder, named after the moment it was taken:
~/Library/Caches/ContextClip/captures/<YYYY-MM-DD_HH-MM-SS-mmm>/— the captures themselves. The 25 most recent folders are kept; older ones are deleted automatically, because they hold screenshots of whatever you were looking at.~/Desktop/ContextClip-latest— a shortcut to the latest capture folder, on the Desktop so you can open it in Finder without typing a path. On by default; turn it off in Settings → Capture → Shortcut on the Desktop. Open Latest Bundle in the menu works either way, through the cache shortcut below.~/Library/Caches/ContextClip/latest— the same shortcut inside the cache folder, for agents and scripts that prefer a stable path.
Inside each folder: capture1.md, capture.md, screenshot.png, accessibility.json.
With Unique file name turned on in Settings → Capture, the folder also holds a copy
named ContextClip-2026-09-23-101500.md, and the formats that attach a file attach that
copy. It is for chats that keep every attachment and rename repeats to capture1(2).md.
First-run setup
- Install and open ContextClip. It appears only in the menu bar.
- The Setup Assistant opens and walks through the two permissions macOS requires: Accessibility to read the interface, Screen Recording for the screenshot.
- Grant them. No restart is needed — ContextClip notices within a second and the next shortcut works.
- Menu → Paste To → Claude Code, Cursor, Codex or ChatGPT Classic, whichever you use.
- Hover a window you own (TextEdit is fine for a smoke test). Press ⌃⌥C.
- ⌘V into the agent. Ask: “What did you receive?”
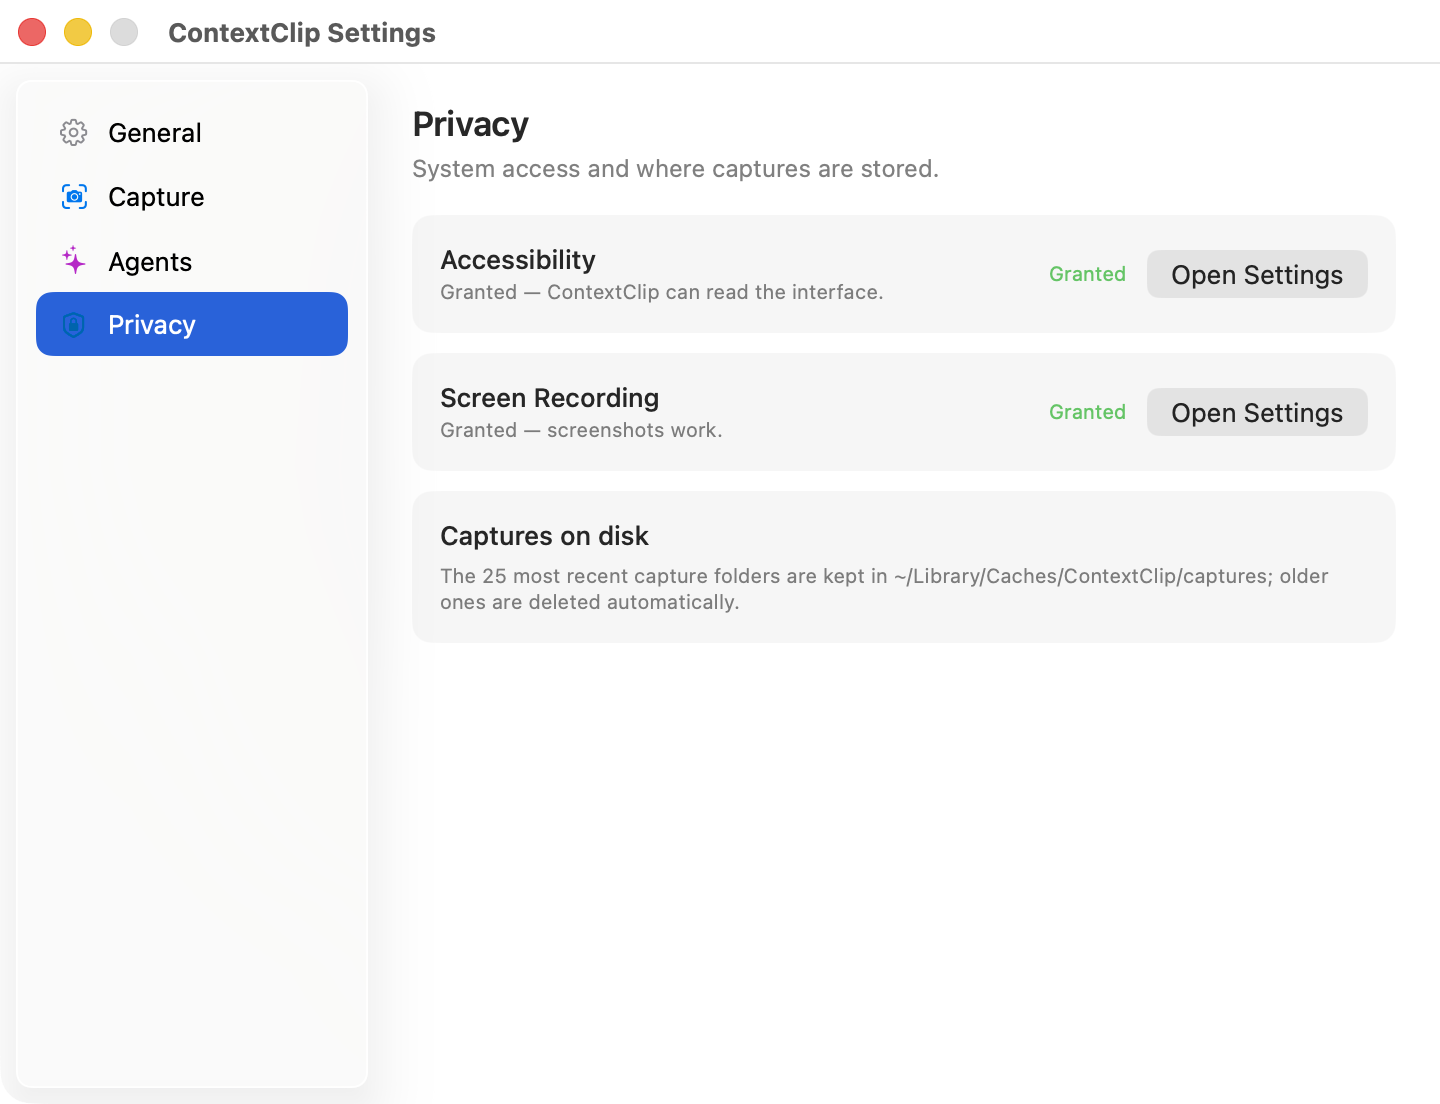
You can reopen the walkthrough any time from Setup Assistant… in the menu. Settings → Privacy shows the live state of both permissions and jumps into the right System Settings pane; revoking a grant shows up there within a second too.
ContextClip never uploads captures. Everything stays on your Mac — clipboard, the cache folder, and the Desktop shortcut to the latest capture if you keep it. Only the 25 most recent captures are kept; older folders are deleted automatically, because they hold screenshots of whatever you were looking at. You choose what to paste, and into which chat.
What it cannot do
Four limits worth knowing before you hit them.
- Electron windows — Cursor, VS Code and the like — publish a thinner accessibility tree than native apps. The screenshot is unaffected, so you still get the picture; the tree simply has less in it.
- An app with no accessibility support at all gives you the screenshot and a note saying the tree was unavailable.
- A very large window arrives trimmed: the tree stops at six levels deep and 240 nodes. The controls around the pointer are collected separately, with their own budget, so the thing you pointed at survives the trim.
- Several displays are supported, including ones sitting above or below each other.
A typical day
- You hit a control that is wrong, unnamed, or ambiguous in a screenshot.
- Point at it (or draw a region).
- ⌃⌥C.
- ⌘V in the agent that is already in that project.
- Ask a concrete question: “Which SwiftUI view is this, and what identifier should I give it?”
If the agent only saw a picture, you are probably on the Claude v2 format inside Cursor (or on Cursor v1). Switch to Cursor v2. You should not need to do that every day.
Early access
The icon, the paste formats, and region snap are still changing. If a paste into your usual agent is thin or noisy, that is a product bug — tell us:
- Which agent (Claude Code desktop / Cursor / Codex / ChatGPT Classic / other)
- Capture mode and paste format
- What arrived (image / @file / text / nothing)
- Whether region or the whole window would have been better
Those four answers are more useful than a crash log for this app.
Use Send Feedback in the menu — it opens the contact form on noteifyapp.com — or write to [email protected].
Licence and updates
ContextClip is a paid app with a trial. The menu shows the current state — trial, active, or not activated — and Buy / Activate License… opens the purchase and activation dialog. Once activated, the same slot becomes Manage License…, where you can see the licence code and release the activation from this machine.
Check for Updates… in the menu asks the update feed directly; the app also checks in the background about twice a day.
Requirements
- macOS 15.6 or later, Apple silicon or Intel
- Screen Recording + Accessibility (granted through the Setup Assistant, no restart)
- An agent you already use: Claude Code, Cursor, Codex, or ChatGPT Classic (or any chat you can paste into)