How SuperTab widgets work
Widgets are tiny web pages — HTML, CSS, and a little JavaScript — shown as tiles in your SuperTab panel: a clock, a calendar, a live chart, anything a web page can draw.
SuperTab reads the same widget format as the open-source Wigify project, so most templates from its catalog work here without changes. A template that uses more than the basic format may need a small adjustment.
Add a Widgets row
Two ways:
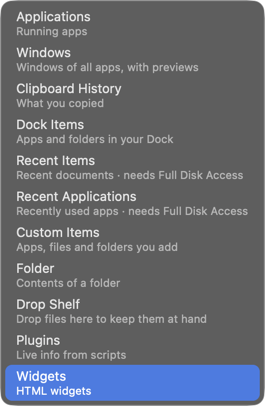
- Click Add row at the bottom of the panel and choose Widgets from the menu of row types.
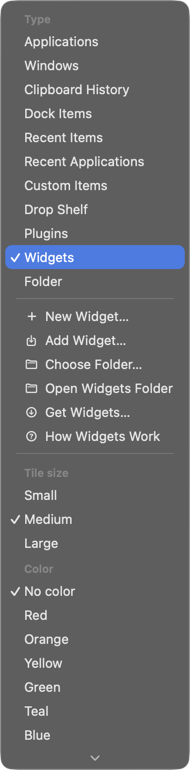
- Or click the name of a row you already have and choose Type → Widgets.
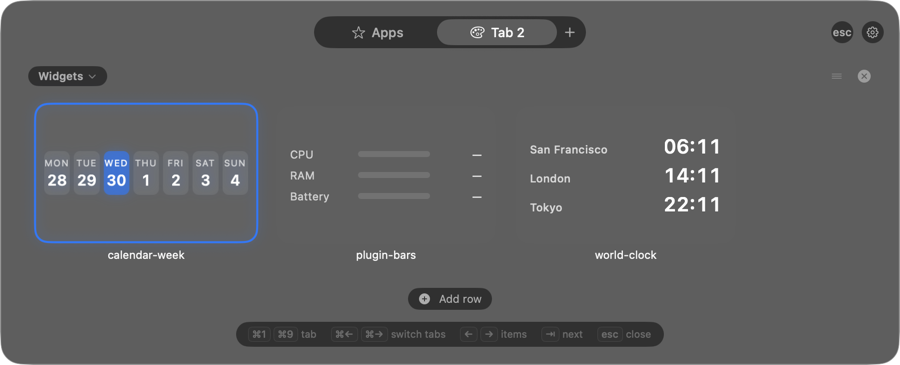
The row shows three built-in widgets right away. Right-click a widget to see more actions.
Built-in widgets
- world-clock — the current time in three time zones.
- calendar-week — the current week, with today highlighted.
- plugin-bars — reads the output of the
system.30s.shplugin from a Plugins row and draws CPU, RAM, and battery as coloured bars. A small demo of the bridge to plugins (see below).
All three read only what is already on your Mac: the system clock and calendar, and the output of a plugin from a Plugins row.
Add more widgets
A ready-made widget from the catalog
- Click the row name and choose Get Widgets…. The Wigify
widget-templatescatalog opens in your browser. - Download the template folder you like.
- Back in SuperTab, click the row name and choose Add Widget…, then select the folder you downloaded.
The widget appears as a tile right away.
Your own widget
Choose New Widget… and give it a name. SuperTab creates a folder with three ready-to-edit files — widget.html, style.css and script.js — and opens that folder in Finder. Edit the files, then right-click the tile and choose Reload to see the result.
Manage widgets
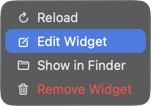
Right-click a widget to find:
- Reload — reload the page.
- Edit Widget — opens the widget’s folder.
- Show in Finder
- Remove Widget — moves the folder to the Trash.
Several rows of widgets
Each new Widgets row gets a folder of its own — Widgets 2, Widgets 3 and so on — with its own copy of the example widgets. Removing a widget in one row does not touch the others. The first Widgets row keeps the folder it always had. To point a row at a different folder, click the row name and choose Choose Folder…. To jump straight to a row’s folder in Finder, choose Open Widgets Folder from the same menu.
Write your own widget
A widget is a folder with up to three files:
widget.html— required.style.css,script.js— optional, referenced from the HTML the normal way.
<!doctype html>
<html lang="en">
  <head>
    <meta charset="utf-8">
    <title>My widget</title>
    <link rel="stylesheet" href="style.css">
  </head>
  <body>
    <!-- Everything under <body> is your widget.
         The background is transparent so the SuperTab glass
         shows through — set your own if you need one. -->
    <h1 id="title">Hello, widget!</h1>
    <p id="subtitle">Edit widget.html to make it yours.</p>
    <script src="script.js"></script>
  </body>
</html>
Keep the background transparent in your CSS unless you want your own:
html, body {
  margin: 0;
  padding: 0;
  background: transparent;
}
The bridge to plugins
A widget can read the parsed output of a plugin from any Plugins row with window.supertab.plugin(name) — see how plugins work for what a plugin is and how to add one. Only plugins you have already allowed in a Plugins row are available to a widget. If that Plugins row has a recent result, the widget gets it; if not, SuperTab runs the plugin the same way the Plugins row does. A widget cannot run a plugin you haven’t allowed, or any other script.
<script type="module">
  const out = await window.supertab.plugin("system.30s.sh");
  // out.header — the tile lines (each with color/icon/font)
  // out.menu   — the menu items after the first `---`
</script>
await at the top level needs type="module". In a plain <script> wrap the call instead: (async () => { … })();
window.supertab.onRefresh(callback) registers a callback that fires whenever a plugin the widget reads gets a fresh result.
More
Browse ready-made widget templates: https://github.com/wigify/wigify/tree/main/widget-templates